
Auxbeam switch panels offer versatile control for vehicle accessories‚ enhancing functionality and organization. These systems‚ detailed in user manuals‚ provide a streamlined approach to managing auxiliary lights and devices.
These panels‚ like the BA80 and BB80 models‚ feature automatic dimming and Bluetooth app control (RGB versions)‚ simplifying operation and customization for optimal user experience.
What are Auxbeam Switch Panels?
Auxbeam switch panels are comprehensive systems designed to control a variety of vehicle accessories‚ primarily lighting‚ with ease and efficiency. These kits‚ as outlined in the Auxbeam switch panel manual‚ typically include a control box‚ the switch panel itself‚ and a complete wiring harness for installation.
Available in various configurations – like the 8-gang BA80 and BB80 series – they offer both single and two-sided outlet options. Modern panels even boast Bluetooth connectivity for app-based control and features like automatic dimming‚ providing a customizable and user-friendly experience.
Benefits of Using an Auxbeam Switch Panel
Auxbeam switch panels‚ detailed in the Auxbeam switch panel manual‚ offer numerous advantages. They provide a clean‚ organized‚ and professional-looking solution for controlling auxiliary devices‚ eliminating messy wiring and scattered switches.
Benefits include simplified operation‚ enhanced safety through proper fuse protection‚ and convenient features like automatic dimming and Bluetooth control (on select models). The included wiring harnesses‚ often with extensions‚ ensure compatibility and ease of installation‚ maximizing functionality and user convenience.
Understanding the Components
Auxbeam switch panels consist of a control box‚ the user interface switch panel itself‚ and a wiring harness. The Auxbeam switch panel manual details each component’s function.
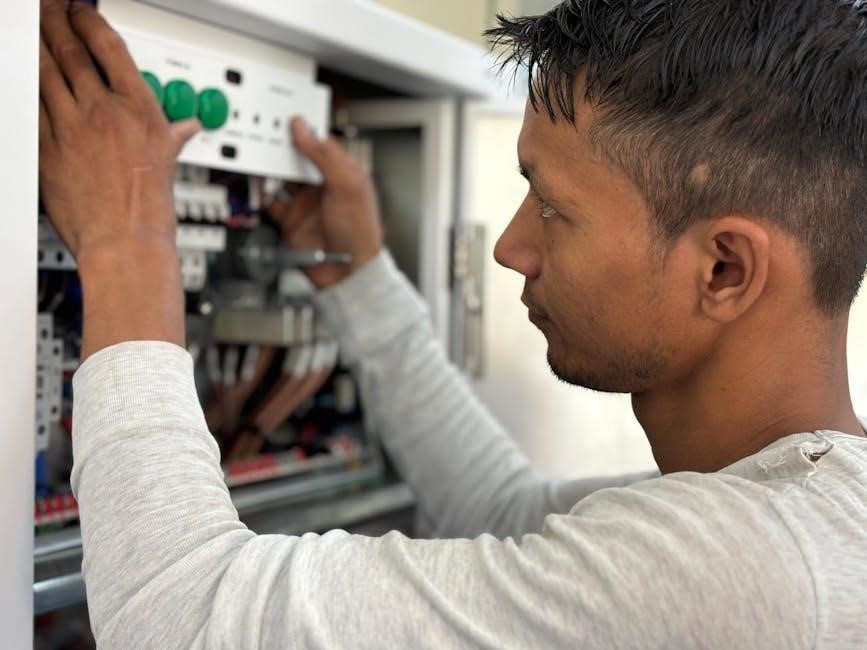
Control Box: The Brain of the System
The control box serves as the central hub for the Auxbeam switch panel system‚ managing power distribution and signal processing. As outlined in the Auxbeam switch panel manual‚ it receives input from the switch panel and regulates output to connected accessories.
Proper connection of the power harness to the control box is crucial for functionality and safety. The manual emphasizes ensuring sufficient wire length for desired mounting locations. This component dictates the overall performance and reliability of the entire setup‚ handling up to 60A of current.
Switch Panel: User Interface and Control
The switch panel provides the user interface for operating connected accessories. Auxbeam switch panel manuals detail the on/off functionality of each switch‚ alongside features like automatic dimming and RGB lighting control via Bluetooth app (on select models).
Panels like the BA80 and BB80 offer universal compatibility and a streamlined design. Proper installation‚ as described in the manual‚ ensures intuitive control and easy access to power distribution for various vehicle upgrades. It’s the primary point of interaction for the user.
Wiring Harness: Connecting Everything Together
The wiring harness is crucial for linking the control box‚ switch panel‚ and power source. Auxbeam switch panel manuals emphasize secure connections and proper routing. Extension harnesses‚ like the 4-pin design‚ offer plug-and-play convenience for customized installations.
These harnesses are built with thick‚ durable wires offering EMI/RF interference protection. Correct wiring‚ detailed in the manual‚ ensures reliable power delivery and prevents electrical issues. Careful attention to wiring is vital for system functionality and safety.
Installation Guide: General Steps
Auxbeam switch panel manuals guide users through mounting‚ wiring‚ and power connection. Select a secure location‚ route the harness carefully‚ and connect to the battery or fuse box.
Choosing the Mounting Location
Selecting the ideal mounting location is crucial for convenient access and optimal functionality‚ as detailed in the Auxbeam switch panel manual. Consider a spot easily reachable while driving‚ yet protected from accidental bumps or interference.
Under the dash or on a center console are common choices. Ensure sufficient space exists behind the mounting surface for wiring and the control box. The Jeep JK installation example highlights mounting options within reach of the driver. Prioritize a location that doesn’t obstruct vital controls or airbags for safety.
Routing the Wiring Harness
Proper wiring harness routing‚ as outlined in the Auxbeam switch panel manual‚ is essential for a clean and reliable installation. Route the harness carefully‚ avoiding sharp bends or pinch points that could damage the wires.
For battery connections‚ route wires through the firewall using a grommet to maintain a weatherproof seal. Secure the harness with zip ties to prevent it from dangling or interfering with vehicle operation. The Jeep JK installation demonstrates routing wires through the firewall for a tidy setup.
Connecting to the Power Source (Battery)
Connecting to the battery requires careful attention to safety‚ as detailed in the Auxbeam switch panel manual. Utilize a ring terminal connected to the positive battery terminal for a secure connection.
Ensure the connection is tight and protected to prevent corrosion. The manual highlights that the switch should be off when not in use to conserve battery power. Proper fusing is crucial; the panel supports DC 12-24V with ratings of 12V 20A / 24V 10A.
Wiring Options Explained
Auxbeam switch panels offer flexible wiring: direct battery connection for maximum power‚ or connection to the vehicle’s fuse box for convenience and integrated protection.
Direct Battery Connection
Direct battery connection provides a robust power source for your Auxbeam switch panel‚ ensuring reliable operation of high-demand accessories. This method involves running a ring terminal directly to the battery’s positive terminal.
Carefully route the wires through the firewall‚ protecting them from heat and abrasion. Remember to switch the system off when the vehicle isn’t running to prevent battery drain. This setup bypasses the vehicle’s wiring‚ offering a dedicated power supply.
Always use appropriate fuse protection near the battery connection for safety.
Fuse Box Connection
Connecting to the fuse box offers a convenient power source for your Auxbeam switch panel‚ utilizing the vehicle’s existing electrical system. Identify an appropriate‚ unused fuse slot with sufficient amperage for the panel’s load.
Use an add-a-fuse to tap into the fuse box‚ ensuring the new fuse rating matches the accessory’s requirements. This method simplifies installation‚ but verify the fuse box can handle the additional current draw.
Proper fuse protection is crucial for safety and preventing electrical issues.

Specific Models & Features
Auxbeam offers diverse switch panels‚ including the BA80 (8-gang‚ single outlet) and BB80 (8-gang‚ two-sided outlet) with automatic dimming and robust construction for various applications.
BA80 (Single Series 8 Gang) ⸺ Features & Specs
The BA80 is an 8-gang LED switch panel designed for universal applications‚ offering a single-sided outlet for convenient accessory control. It boasts automatic dimming functionality‚ adjusting brightness based on ambient light for comfortable viewing.
This panel operates within a DC 12-24V range‚ with a rated voltage of 12V 20A / 24V 10A‚ and a maximum power rating of 600W at 12V. Constructed with a durable build‚ the BA80 provides reliable performance and features a 20-foot‚ 4-pin wiring harness extension for easy installation.
BB80 (Single Series 8 Gang‚ Two-Sided Outlet) ⏤ Features & Specs
The BB80 model is an 8-gang LED switch panel distinguished by its two-sided outlet design‚ offering increased connectivity for various accessories. Like the BA80‚ it incorporates automatic dimming for optimal visibility in all lighting conditions.
Operating within a DC 12-24V range‚ it provides a rated voltage of 12V 20A / 24V 10A‚ and a maximum power rating of 600W at 12V. This panel ensures reliable performance and is compatible with a 20-foot‚ 4-pin wiring harness extension for simplified installation.
AC-1200 Switch Panel ⏤ Installation in a Jeep JK
Installing the Auxbeam AC-1200 in a Jeep JK involves routing the wiring harness through the firewall. A key option is direct battery connection using a ring terminal on the positive terminal. The switch‚ controlling system power‚ should be mounted conveniently under or on the dash and switched off when the vehicle isn’t running.
Ensure the control wire and expansion plug-and-play wire are sufficiently long for the desired mounting location. Proper connection to the control box is vital for functionality and safety‚ as detailed in the user manual.
Electrical Specifications
Auxbeam switch panels operate at DC 12-24V‚ with ratings of 12V 20A / 24V 10A. Maximum power is 600W/1200W‚ and maximum current reaches 60A.
Working Voltage (DC 12-24V)
Auxbeam switch panels are designed with broad compatibility‚ supporting both 12-volt and 24-volt DC electrical systems commonly found in various vehicles. This versatility makes them suitable for cars‚ trucks‚ Jeeps‚ boats‚ and other applications.
The panels automatically adjust to the input voltage‚ ensuring optimal performance and preventing damage. This wide voltage range simplifies installation‚ eliminating the need for voltage converters in many cases. Always verify your vehicle’s electrical system before installation.
Rated Voltage & Current (12V 20A / 24V 10A)
Auxbeam switch panels are meticulously engineered for safety and performance‚ boasting specific current ratings based on input voltage. At 12 volts DC‚ each switch circuit is rated for a maximum of 20 amps‚ while at 24 volts DC‚ the rating is 10 amps per circuit.
Exceeding these limits can damage the panel or connected devices. Always calculate the total current draw of accessories connected to each switch to ensure it remains within the specified limits for reliable operation.
Maximum Power Rating (600W/1200W)
Auxbeam switch panels deliver substantial power handling capabilities‚ crucial for demanding accessory applications. When operating at 12 volts DC‚ the panel supports a maximum power output of 600 watts. Increasing the voltage to 24 volts DC doubles this capacity‚ reaching a maximum of 1200 watts.
This rating dictates the total wattage of all devices connected to the panel. Always verify that the combined wattage of your accessories does not surpass the panel’s maximum rating to prevent overload and potential damage.
Maximum Current (60A)
Auxbeam switch panels are engineered to handle significant electrical current‚ ensuring reliable operation of connected accessories. The panels boast a maximum current capacity of 60 amps. This specification is vital for determining compatibility with high-draw devices like powerful LED light bars or winches.
Exceeding this 60-amp limit can trigger the panel’s safety mechanisms or potentially damage the system. Always calculate the total current draw of your accessories and ensure it remains within the panel’s specified limits.

Troubleshooting Common Issues
If the panel fails to power on‚ check the power source‚ wiring connections‚ and fuses. Non-functioning switches may indicate wiring problems or a faulty switch itself.
Panel Not Powering On
If your Auxbeam switch panel isn’t powering on‚ begin by verifying the connection to the power source – ensure the ring terminal is securely attached to the battery’s positive terminal.
Next‚ meticulously inspect the wiring harness for any loose connections or damaged wires‚ paying close attention to the firewall routing. A blown fuse is a common culprit; check and replace the fuse within the control box if necessary.
Confirm the switch itself is in the ‘on’ position‚ as it controls power to the entire system. Finally‚ double-check the working voltage (DC 12-24V) compatibility.
Switches Not Functioning
If individual switches aren’t functioning‚ first confirm the corresponding accessory is in good working order. Inspect the wiring connected to that specific switch for any loose connections or breaks in the wire.
Ensure the control wire and expansion plug-and-play wire are securely connected to the control box. Verify the switch hasn’t been accidentally disabled within the Bluetooth app (for RGB models).
Check the rated voltage and current (12V 20A / 24V 10A) to ensure the accessory doesn’t exceed the panel’s capacity.

Safety Precautions
Prioritize safety during installation; utilize proper fuse protection and wiring best practices. Always disconnect the battery’s negative terminal before commencing any electrical work.
Fuse Protection
Auxbeam switch panels incorporate crucial fuse protection to safeguard your vehicle’s electrical system and connected accessories. The panels are rated for 12V 20A or 24V 10A‚ with a maximum current of 60A.
Always use appropriately sized fuses‚ as specified in the manual‚ to prevent overcurrent situations. Regularly inspect fuses for signs of damage or blowing‚ replacing them immediately if necessary. Proper fuse selection and maintenance are vital for safe and reliable operation‚ preventing potential hazards and ensuring longevity.
Wiring Best Practices
Proper wiring is paramount for a functional and safe Auxbeam switch panel installation. Utilize the provided wiring harness and extensions‚ ensuring secure connections. Route wires away from heat sources and moving parts‚ protecting them from damage.
Employ proper crimping or soldering techniques for all connections. When routing through the firewall‚ use a grommet to prevent chafing. Double-check polarity before connecting to the power source‚ and always disconnect the battery during installation to avoid shorts.

Advanced Features
Auxbeam panels boast Bluetooth app control for RGB models and automatic dimming functionality‚ enhancing user experience. These features provide customization and convenience for optimal control.
Bluetooth App Control (RGB Panels)
Auxbeam RGB switch panels elevate control with seamless Bluetooth app integration. This allows users to customize lighting effects‚ adjust brightness‚ and select from a spectrum of colors directly from their smartphones.
The app provides a user-friendly interface for personalized settings‚ offering precise control over each switch. This feature enhances the aesthetic appeal and functionality of your vehicle’s accessories‚ providing a modern and convenient user experience. Proper connection and app setup are detailed in the user manual.
Automatic Dimming Functionality
Auxbeam switch panels‚ particularly the BA80 and BB80 series‚ incorporate automatic dimming technology for enhanced visibility and reduced glare. This feature intelligently adjusts the panel’s brightness based on ambient light conditions‚ ensuring optimal viewing day or night.
The automatic dimming function minimizes driver distraction and improves safety. Detailed instructions on enabling and customizing this feature are provided within the comprehensive user manual‚ allowing for a tailored experience.
Wiring Harness Extensions
Auxbeam offers 4-pin wiring harness extensions with a “Play and Plug” design for easy installation and expanded reach. These extensions provide EMI/RF interference protection;
4-Pin Wiring Harness Extension ⸺ Play and Plug Design
Auxbeam’s 4-pin wiring harness extension simplifies installation with its convenient “Play and Plug” design. This 20-foot extension allows for flexible controller box placement‚ ensuring ample reach for various vehicle configurations.
Constructed with a thick‚ durable hard wire‚ this extension isn’t just about convenience; it’s built for longevity and reliability. Crucially‚ it delivers superior protection against electromagnetic (EMI) and radio frequency (RF) interference‚ safeguarding against automotive circuit disruptions.
EMI/RF Interference Protection
Auxbeam prioritizes signal integrity with robust EMI/RF interference protection built into its switch panel systems. The premium wiring harnesses‚ particularly extensions‚ utilize especially thick hard wire construction to minimize disruption from automotive circuits and external sources.
This shielding safeguards the panel’s functionality‚ ensuring consistent and reliable operation of connected accessories. By mitigating interference‚ Auxbeam delivers a stable and dependable power control solution‚ enhancing the overall user experience and system performance.
Maintenance and Care
Regular inspection of wiring connections and gentle cleaning of the switch panel surface will ensure long-lasting performance and reliability of your Auxbeam system.
Cleaning the Switch Panel
Maintaining a clean switch panel ensures optimal visibility and functionality. Use a soft‚ slightly damp cloth to gently wipe the surface‚ removing dust and grime.
Avoid harsh chemicals or abrasive cleaners‚ as these can damage the panel’s finish or affect the electronic components. For stubborn marks‚ a mild soap solution can be used‚ followed by a clean water rinse and thorough drying.
Ensure the panel is completely dry before restoring power to prevent any electrical issues. Regular cleaning contributes to the longevity and aesthetic appeal of your Auxbeam switch panel.
Inspecting Wiring Connections
Regularly inspect all wiring connections associated with your Auxbeam switch panel to ensure secure and reliable operation. Check for loose connections at the control box‚ switch panel‚ battery terminals‚ and fuse box.
Look for any signs of corrosion‚ fraying‚ or damage to the wiring harness. Tighten any loose connections and replace damaged wires immediately. Proper wiring is crucial for safety and functionality‚ preventing potential electrical hazards.
A thorough inspection contributes to the system’s longevity and performance.
Warranty Information
Auxbeam provides warranty coverage for its switch panels‚ protecting against manufacturing defects. Contact customer support for specific terms and to initiate a claim‚ ensuring product satisfaction.
Auxbeam Warranty Coverage
Auxbeam stands behind the quality of its switch panels‚ offering a comprehensive warranty against defects in materials and workmanship. This coverage typically spans a defined period from the original purchase date‚ ensuring customer peace of mind.
The warranty specifically addresses issues arising from normal use‚ excluding damage caused by improper installation‚ misuse‚ accidents‚ or modifications. To make a claim‚ retain your proof of purchase and contact Auxbeam’s customer support team. They will guide you through the process‚ potentially requiring product inspection or return.
Detailed warranty terms and conditions are available on the Auxbeam website‚ outlining the scope of coverage and any limitations.
Contacting Customer Support
Auxbeam provides multiple avenues for customers needing assistance with their switch panels. For prompt support‚ visit the official Auxbeam website‚ where a detailed FAQ section addresses common questions and troubleshooting tips.
You can also reach their dedicated customer support team via email‚ typically receiving a response within 24-48 hours. Additionally‚ Auxbeam maintains an active presence on social media platforms‚ offering another channel for inquiries.
When contacting support‚ have your order number and product details readily available to expedite the assistance process.
Leave a Reply